


IZNIK is the theme for today. Inspired by Kim's Moroccan tables, I had wanted to make minis out of these Iznik ceramic plates I hand carried home all the way from Istanbul 9 years ago.
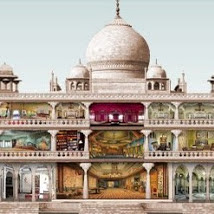
These plates are so beautiful I have decided that if I can indeed make minis out of them, I will devote an entire room to showcasing my Iznik ceramics.


Making my 9 books on Iznik plates took me 5 days, 4 of which was spent on research and "adobe-ing" the pages of my books. This is the production process:
I had earlier bought a set of antique book templates or cut outs from paperminis. The book covers (which are gorgeous) are from paperminis but I had to create the pages as the antique books came with blank ones. After about 2 days of research, I amassed over 100 designs of Iznik plates. Many of them are museum pieces or Sotheby's collectors' items. I created 12 titles:


Each page has a picture of the plate and a short description. For the museum series, I have also listed the date, style, museum and city. All the books are readable as I will only collect or make readable books.
This is what I did today:
 To create the antique look for the pages, I used a tea-bag to sponge the page . I then sipped the tea I made with the "sponge" (before, of course!) while I waited for the paper to dry into a nice, crisp, crinkly brown. Using the craft knife which I love to death, I then cut the "strips" of pages and place them into my Iznik bowl for viewing pleasure.

I used 2 types of glue, Chemitex Gum which cost S$2 for 1.3kg (excellent for gluing the inside pages but pretty useless for glossy photo paper) and PVA Craft Glue for bonding the covers with the pages. I used pretty much the same method I did for making my 1st mini book on Day 19 EXCEPT this time, NO headbands. ALSO, I found a really good material for making the outer page- foil paper commonly found in cigarette boxes. The foil backing feels really similar to the back of a real book!
Below are pictures of the various stages.


If you look at the 1st pic which is of the various glue-drying stages, you can see the book with the 2 golden strips of ribbons. That was my "brilliant" attempt to substitute the "headache inducing headband" in Day 19. After I made 2 books with this method, I discovered the beauty of foil paper and promptly abandoned the ribbons.
12 hours later, yes, it was 1pm-1am, I finished 9 books (1 1/2 "-1" height & width ) and here they are together with "Indian Miniature Paintings" from Day 19 (my camera conked out on me after this shot. Will post better ones when camera recovers).


 Taken from a much better camera than my Sony Cybershot, the last pic is of my books on a miniature handwoven carpet that Win gave me.

Since I do not own a convection oven yet and cannot start on my polymer project, I decided I would make reference books on Iznik plates instead and perhaps try my hand on the pottery la ter.
ter.
 ter.
ter.
Making my 9 books on Iznik plates took me 5 days, 4 of which was spent on research and "adobe-ing" the pages of my books. This is the production process:
I had earlier bought a set of antique book templates or cut outs from paperminis. The book covers (which are gorgeous) are from paperminis but I had to create the pages as the antique books came with blank ones. After about 2 days of research, I amassed over 100 designs of Iznik plates. Many of them are museum pieces or Sotheby's collectors' items. I created 12 titles:


Each page has a picture of the plate and a short description. For the museum series, I have also listed the date, style, museum and city. All the books are readable as I will only collect or make readable books.
This is what I did today:
 To create the antique look for the pages, I used a tea-bag to sponge the page . I then sipped the tea I made with the "sponge" (before, of course!) while I waited for the paper to dry into a nice, crisp, crinkly brown. Using the craft knife which I love to death, I then cut the "strips" of pages and place them into my Iznik bowl for viewing pleasure.
I used 2 types of glue, Chemitex Gum which cost S$2 for 1.3kg (excellent for gluing the inside pages but pretty useless for glossy photo paper) and PVA Craft Glue for bonding the covers with the pages. I used pretty much the same method I did for making my 1st mini book on Day 19 EXCEPT this time, NO headbands. ALSO, I found a really good material for making the outer page- foil paper commonly found in cigarette boxes. The foil backing feels really similar to the back of a real book!
Below are pictures of the various stages.


If you look at the 1st pic which is of the various glue-drying stages, you can see the book with the 2 golden strips of ribbons. That was my "brilliant" attempt to substitute the "headache inducing headband" in Day 19. After I made 2 books with this method, I discovered the beauty of foil paper and promptly abandoned the ribbons.
12 hours later, yes, it was 1pm-1am, I finished 9 books (1 1/2 "-1" height & width ) and here they are together with "Indian Miniature Paintings" from Day 19 (my camera conked out on me after this shot. Will post better ones when camera recovers).


 Taken from a much better camera than my Sony Cybershot, the last pic is of my books on a miniature handwoven carpet that Win gave me.


Those books just look sooooo amazing. I think I'm going to have a go at making one tonight. Stay tuned!
ReplyDeleteMercedes
Tuning, Mercedes!
ReplyDeleteI hadn't seen this post until now....Yes, I'm looking through all your amazing pictures! And came across your books! WOW! These are really neat! Just wanted to tell ya that:)
ReplyDeleteKatie
Your books are wonderful! So clever making the pages.
ReplyDelete